

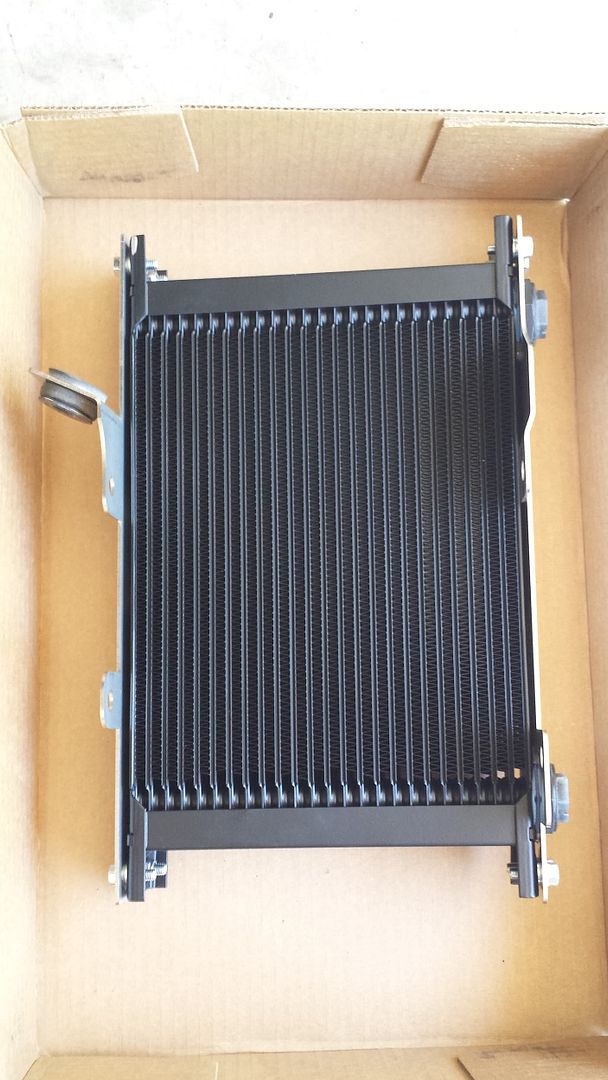
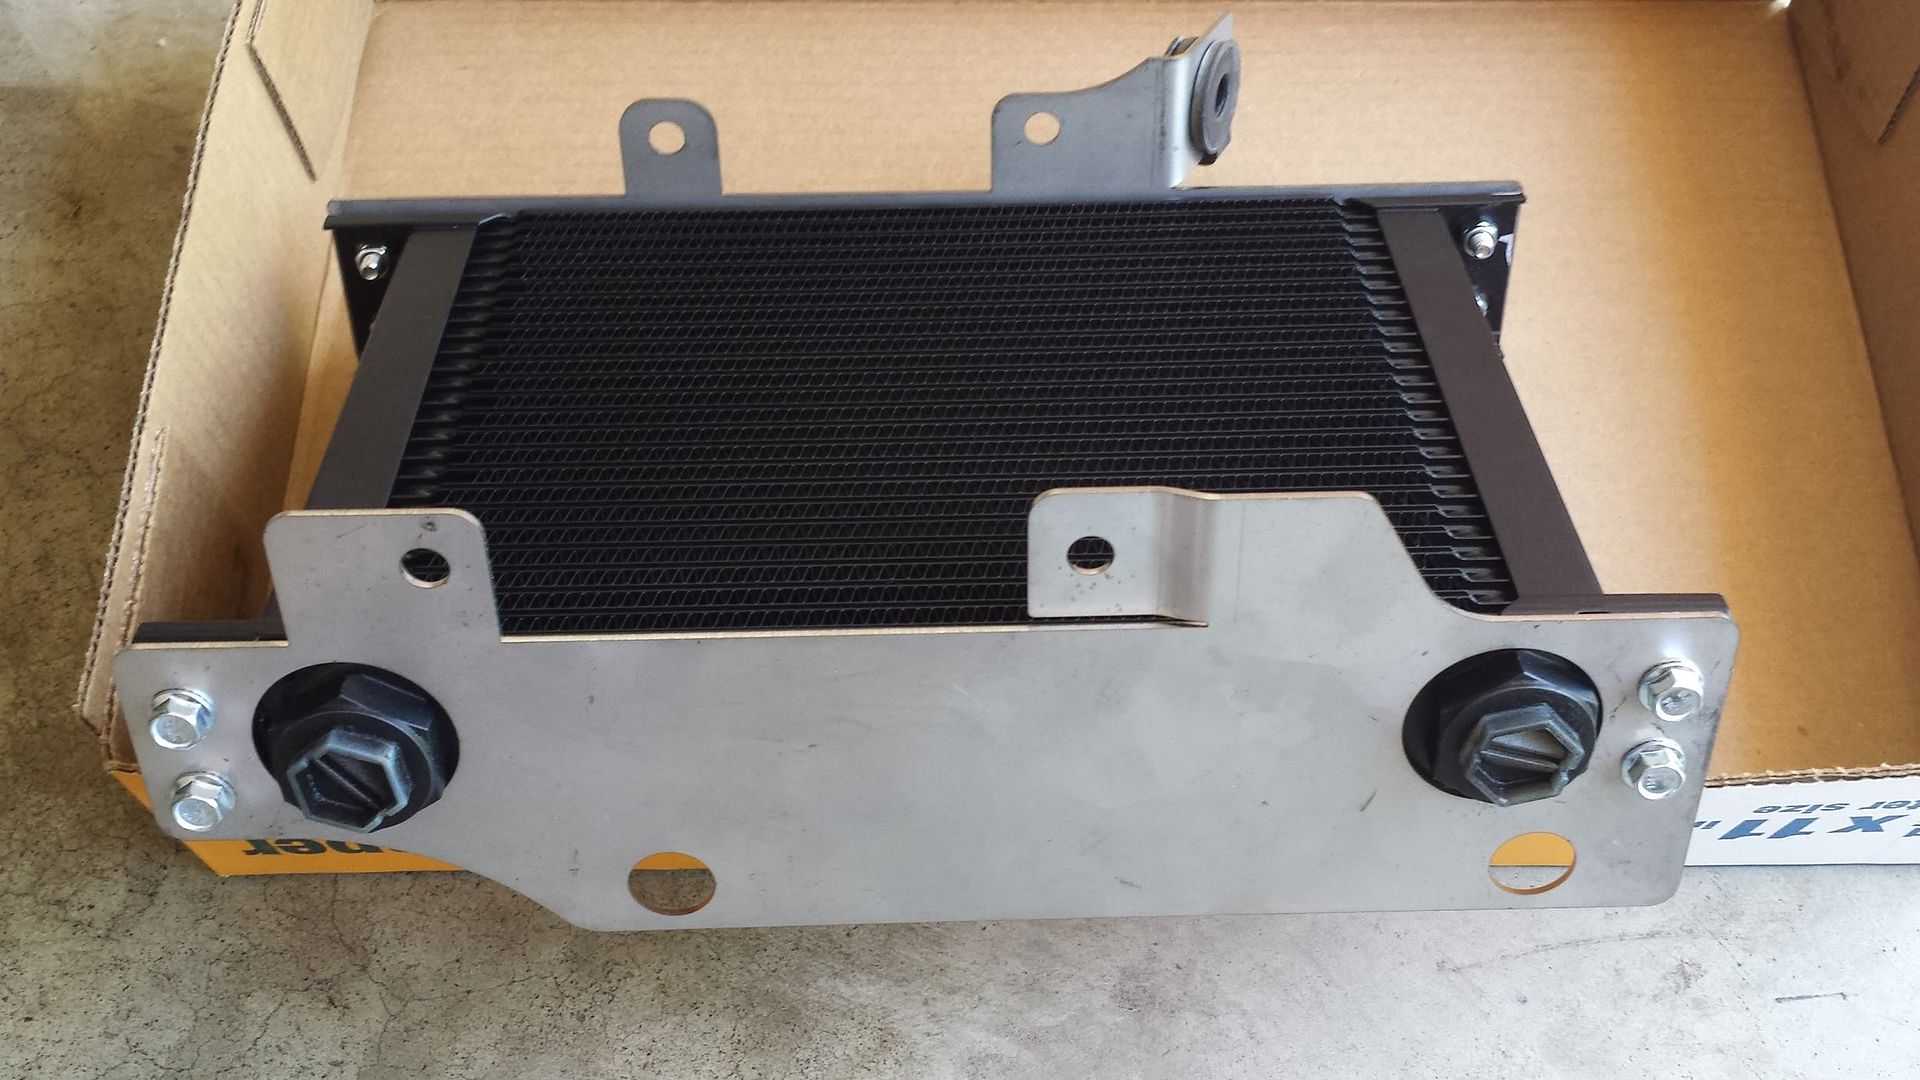
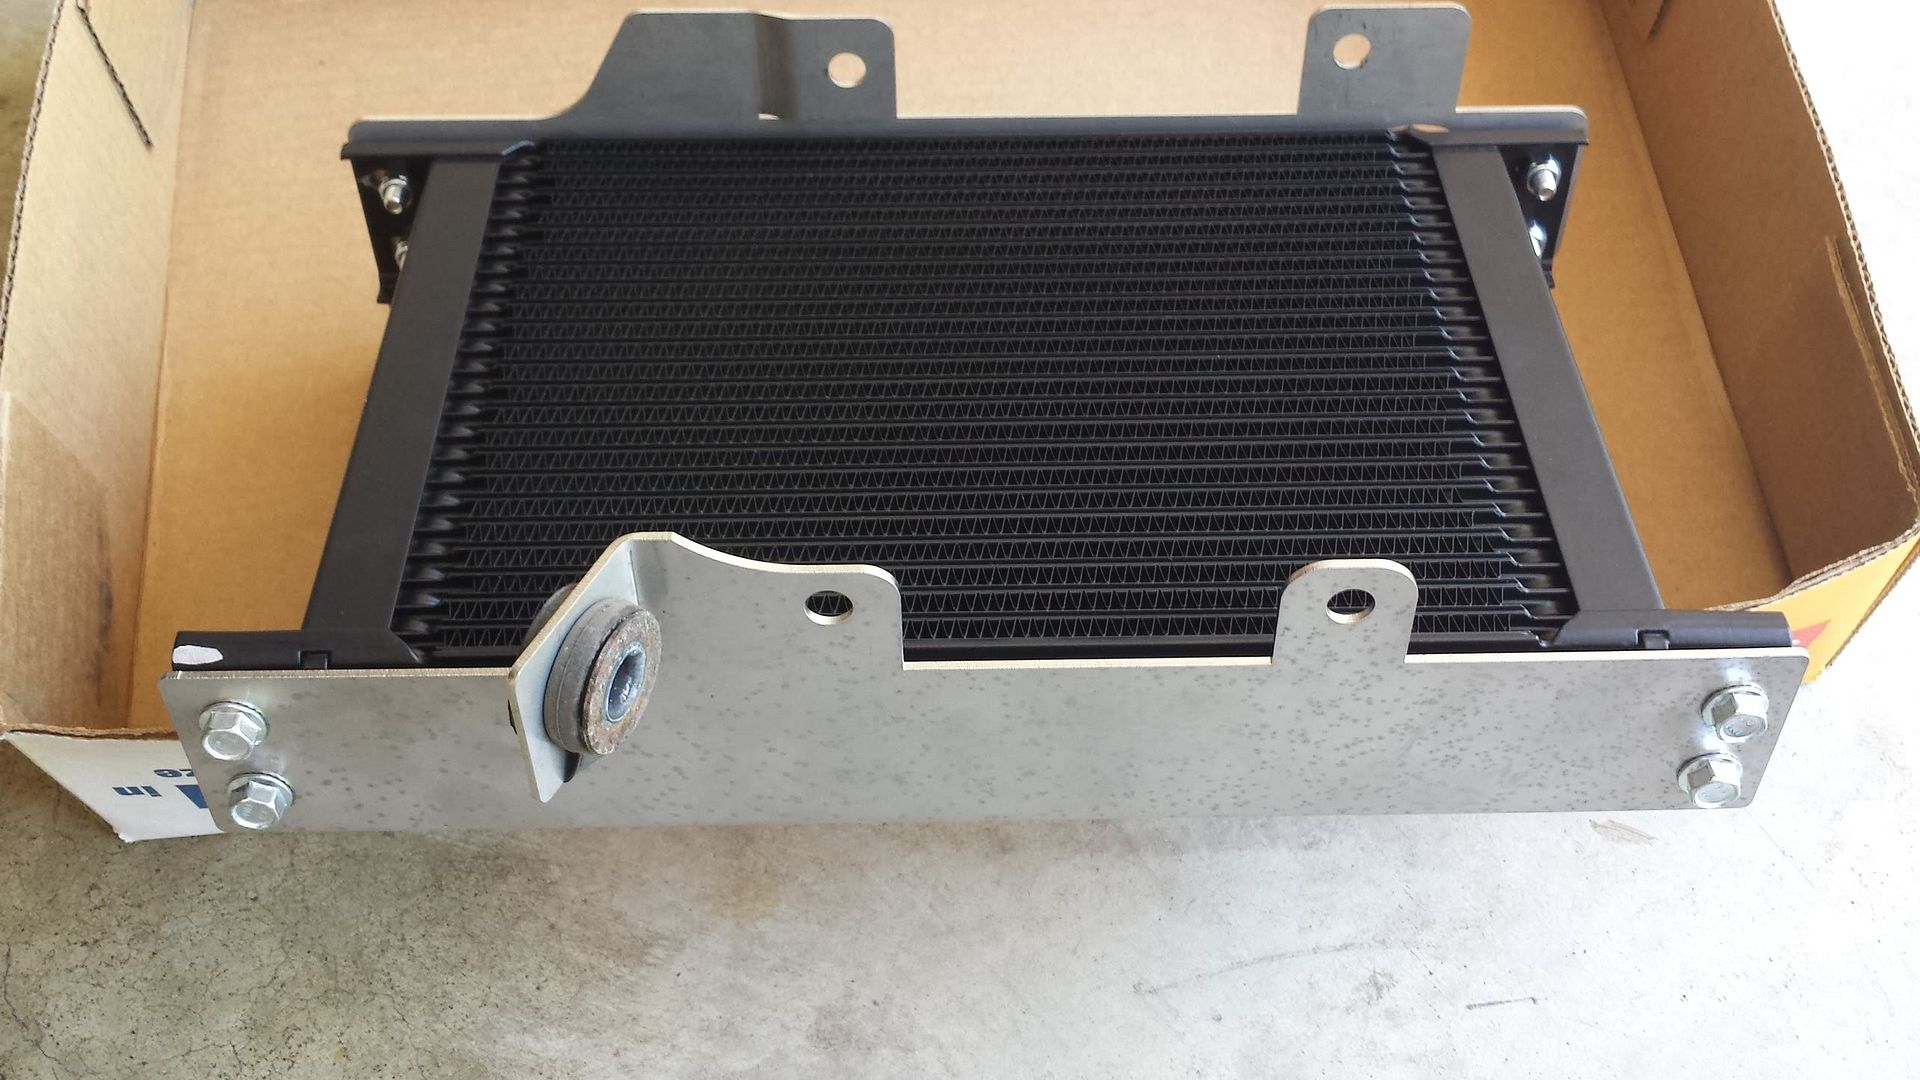
So another new offering from MAP has arrived. Their new OEM location oil cooler that retains OEM air duct. Much simpler than Mishimoto variant we seen with a clear install.
Features a Setrab core, AN fittings, SS braided AN line, all hardware. Utilizes OEM location mounting and air duct.
Parts & Cooler:
![Image]()
![Image]()
![Image]()
![Image]()
![Image]()
Weight & Specs:
OEM cooler, lines, bolts, etc.. ~8.6 lbs (~1.0 lbs either way) some oil left in OEM cooler)
MAP cooler, lines, fittings & hardware, etc... ~ 9.4 lbs (empty ofcourse)
Hp Rating: 325-425
Part #: 50-625-7612
Dimensions: 12.99 x 7.60
Change Psi Range: 2.0/2.5
BTU Rating: 33,100-46,000
Install:
1 - Brackets installed. Note that it has to go: Bolt Head - Bracket - Washer - Oil Cooler - Nylon nut to mount the oil cooler brackets. Otherwise the brackets will bow due to tabs on the cooler. The washers act as spacers.
2 - Install brackets onto frame / body. Reuse OEM bolts & OEM rubber grommets from OEM cooler.

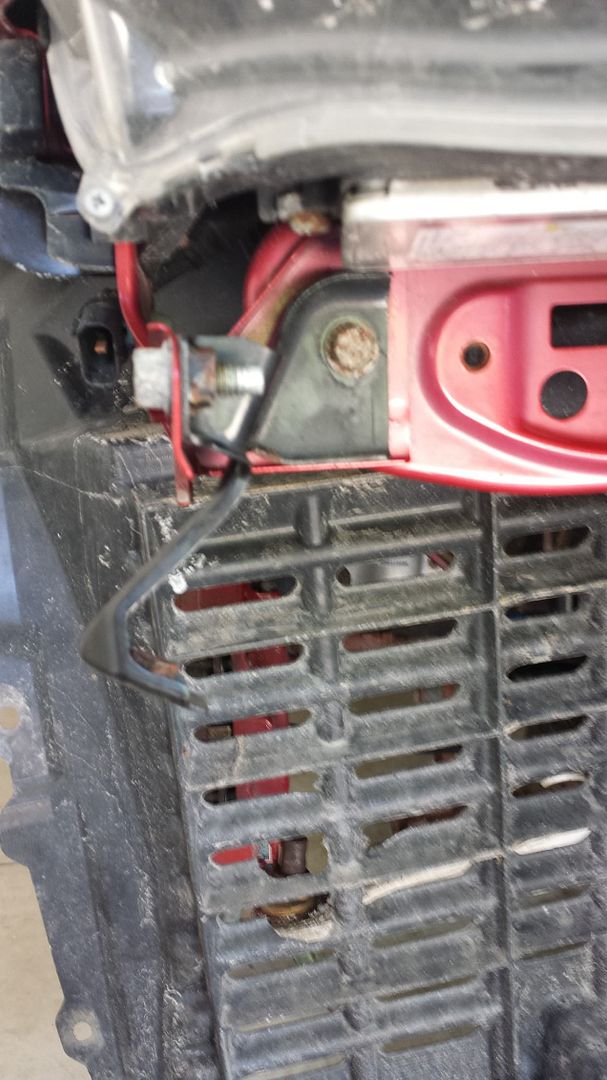
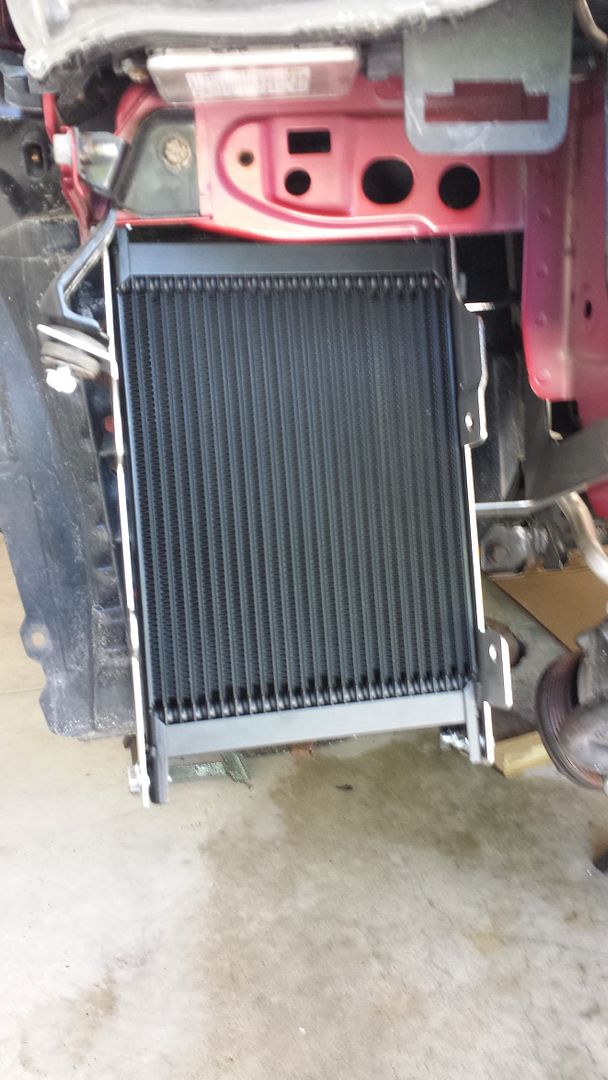
3 - Oil Cooler Mounted
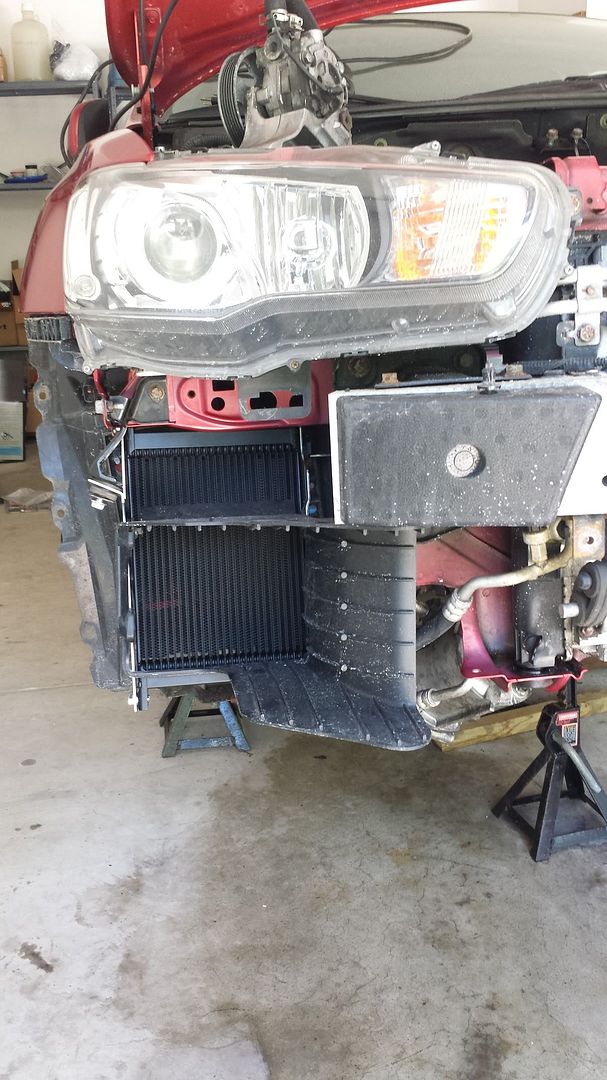
OEM DUCT INSTALLED & Fits very well
4 - Oil Line Install - Will follow once the block is re-installed in the car in next week or two. Should be pretty straight forward though if you ever done AN lines before.
Fit & Finish
Overall the kit is great fit and finish 4.5/5. SS brackets / hardware. Fitment is very snug and secure. Only thing is the bracket on right toward the bumper that is attached to the cooler needs flat head screws.
Allen head cap screw would work well to give extra clearance.
The bracket noted in this picture to the top left. It touches slightly in the inside corner.
More updates will follow once the car is up and running.
Features a Setrab core, AN fittings, SS braided AN line, all hardware. Utilizes OEM location mounting and air duct.
Parts & Cooler:


Weight & Specs:
OEM cooler, lines, bolts, etc.. ~8.6 lbs (~1.0 lbs either way) some oil left in OEM cooler)
MAP cooler, lines, fittings & hardware, etc... ~ 9.4 lbs (empty ofcourse)
Hp Rating: 325-425
Part #: 50-625-7612
Dimensions: 12.99 x 7.60
Change Psi Range: 2.0/2.5
BTU Rating: 33,100-46,000
Install:
1 - Brackets installed. Note that it has to go: Bolt Head - Bracket - Washer - Oil Cooler - Nylon nut to mount the oil cooler brackets. Otherwise the brackets will bow due to tabs on the cooler. The washers act as spacers.


2 - Install brackets onto frame / body. Reuse OEM bolts & OEM rubber grommets from OEM cooler.


3 - Oil Cooler Mounted

OEM DUCT INSTALLED & Fits very well

4 - Oil Line Install - Will follow once the block is re-installed in the car in next week or two. Should be pretty straight forward though if you ever done AN lines before.
Fit & Finish
Overall the kit is great fit and finish 4.5/5. SS brackets / hardware. Fitment is very snug and secure. Only thing is the bracket on right toward the bumper that is attached to the cooler needs flat head screws.
Allen head cap screw would work well to give extra clearance.
The bracket noted in this picture to the top left. It touches slightly in the inside corner.
More updates will follow once the car is up and running.